
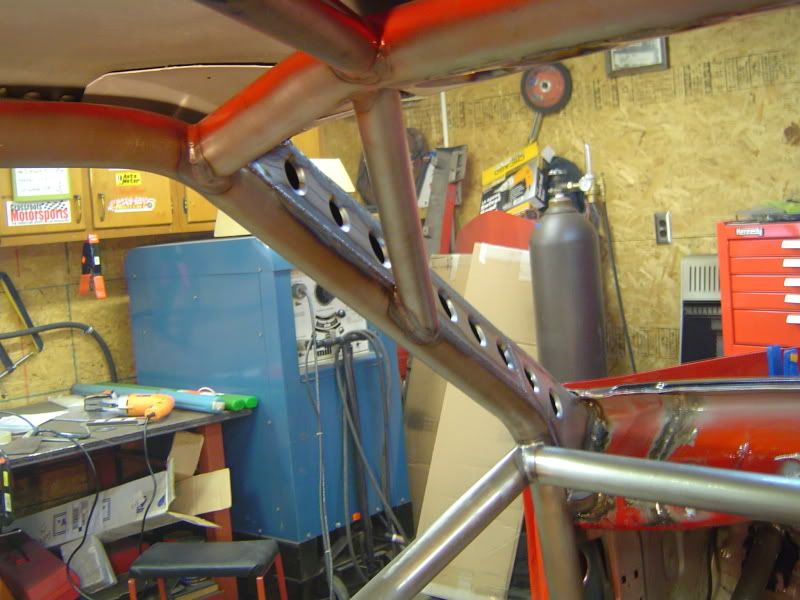
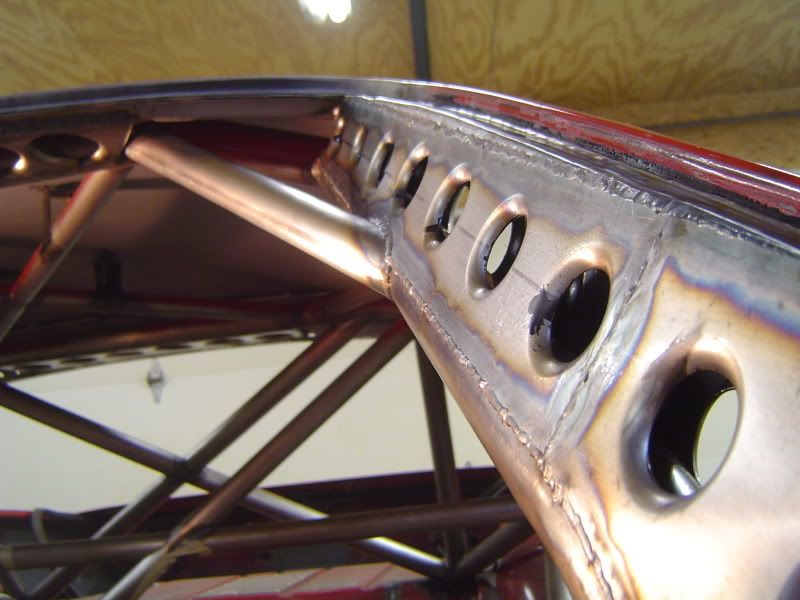
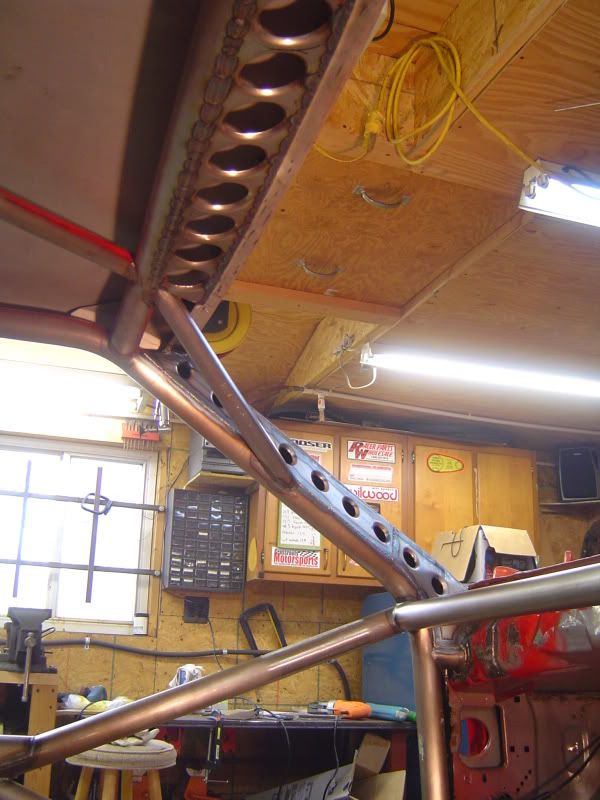
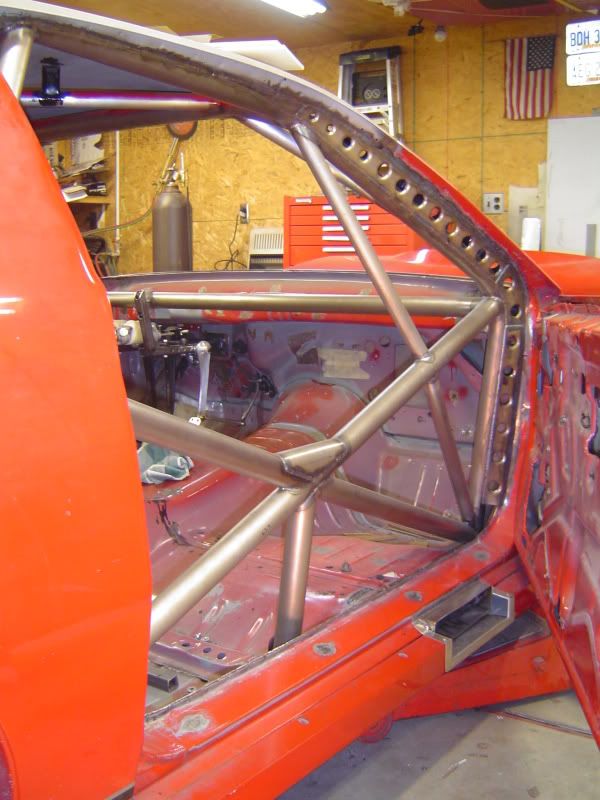
Just finished the drivers side A-pillar yesterday:
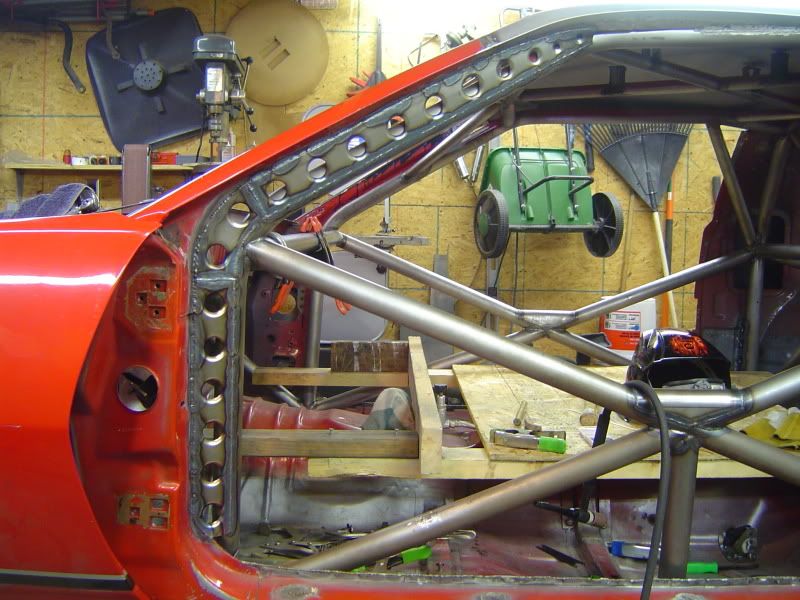


Just finished the drivers side A-pillar yesterday:


Cars coming along nice. Did you have a die to punch the holes in that flat stock? For my brakes I'm running stock car stuff, Wilwood rotors and hats. The calipers are Wilwood dynalites.

Nice job
God Bless our Troops
That's how I roll.
I don't own the dies. I cut the sheet metal and drilled the holes, then sent them to this guy: www.blainefabrication.com to have the stamping done.Originally Posted by TWOBEERS

He has built a lot of road race cars and is the inspiration for a lot of what you see in my car. If you have a chance check out some of the pictures on his website. He has done some awesome stuff.

Wow. Very nice stuff!
1994 Yamaha YZF-750R / 1993 Honda CBR900RR / 1991 Kawasaki ZX-7 / 1992 Kawasaki ZX-7R / 1993 Kawasaki ZX-7 / 1989 Suzuki GSXR-750
how many points does it attach to the chassis?...thats some nice work
Thanks!
If you don't count the sheet metal gussets along the a-pilars and roof it is 10 points.
I'll have some updated pics here pretty soon. Some progress has been made.

Looks great!
Some good news:
Keith at Ice Nine Customs made me an offer I can't refuse
And here's a few of the latest pics:
Above: I cut these bits from a junker the other weekend. I'm going to weld them in ~1/4" recessed from the edge of the body. They will serve as a new flange for the lexan hatch. Riv-nuts, #6 SS screws, and SS counter sunk washers will be placed every 4".
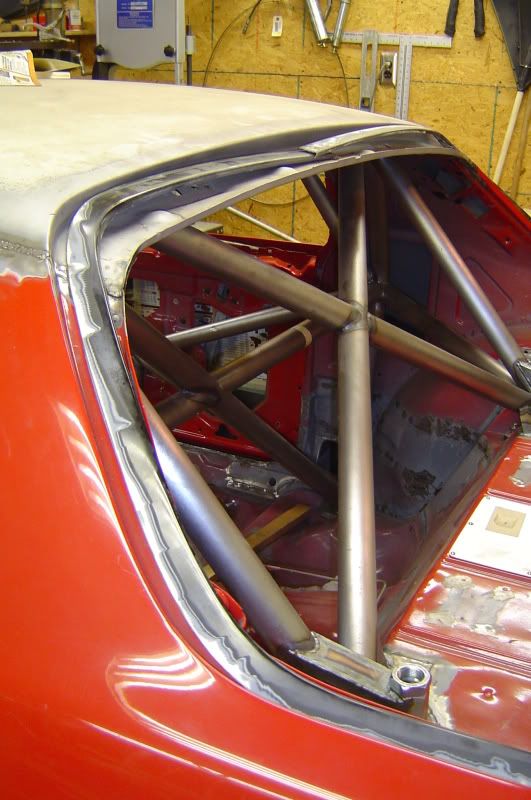
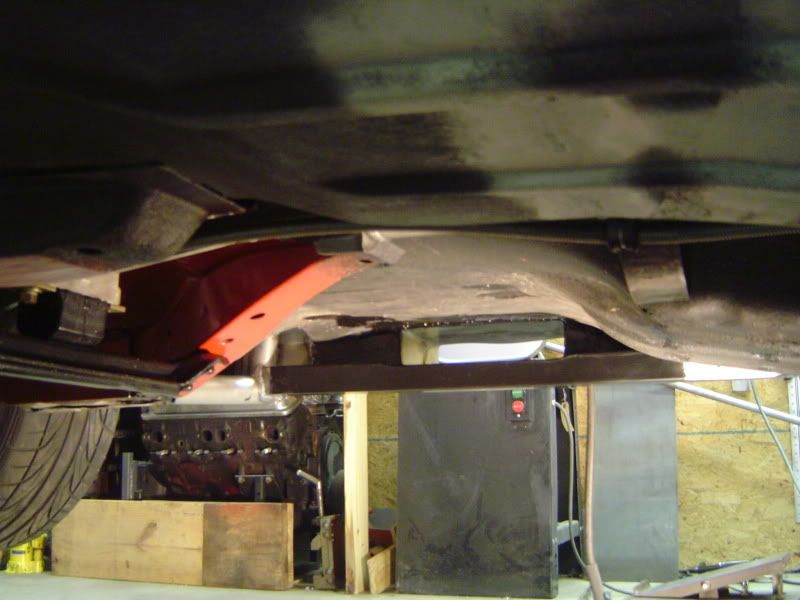
Above: the finished Pass side ties into the A-pillar from the base all the way to the top rear corner of the door window, 100% TIG welded. I also added an additional A-pillar support bar. Down low you'll see the new side exit exhaust hole, and below you'll see what looks like below the car and get an idea of how the exhaust will be routed. A dual 2.5" magnaflow muffler will be just inboard of the hole / SFC.
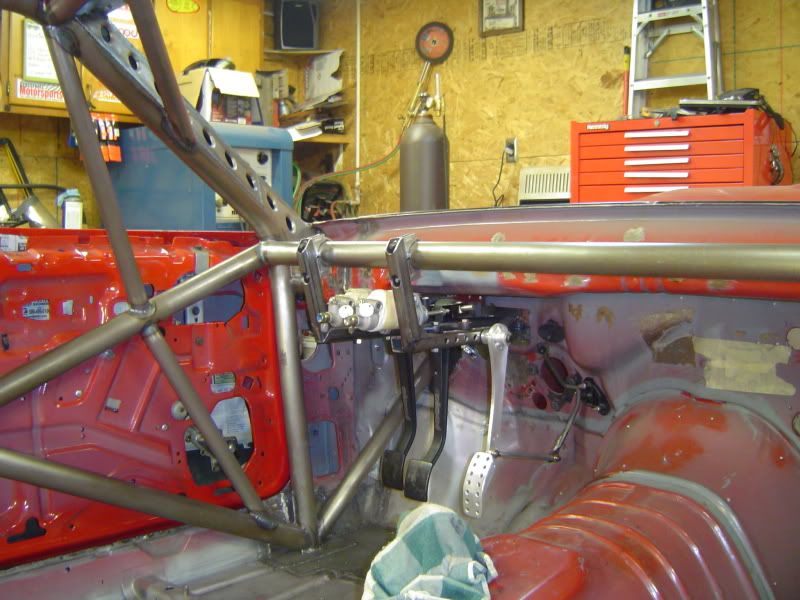
Above: Wilwood reverse triple MC manual brake and clutch pedal set-up with the custom throttle pedal and linkage that I made (clutch MC not shown). A Woodward Steering column is on order from www.blainefabrication.com and I'll need to fab up a new column mount.
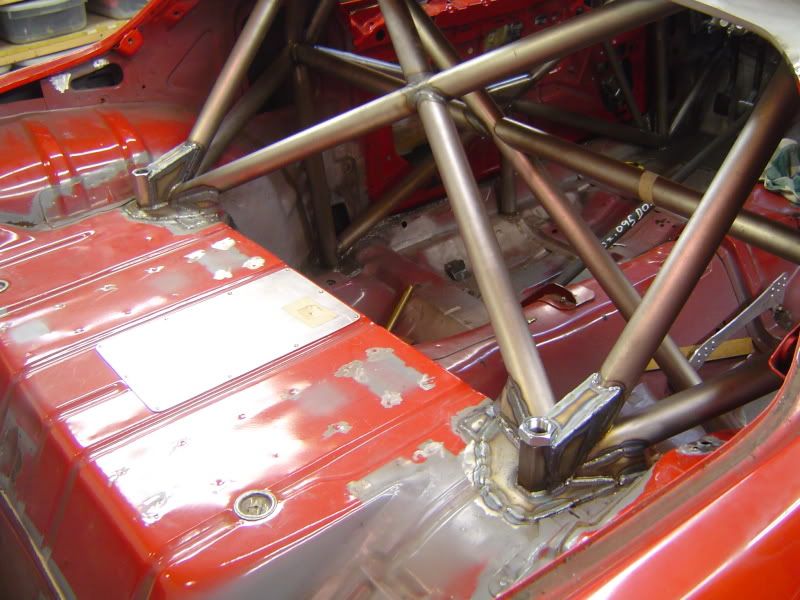
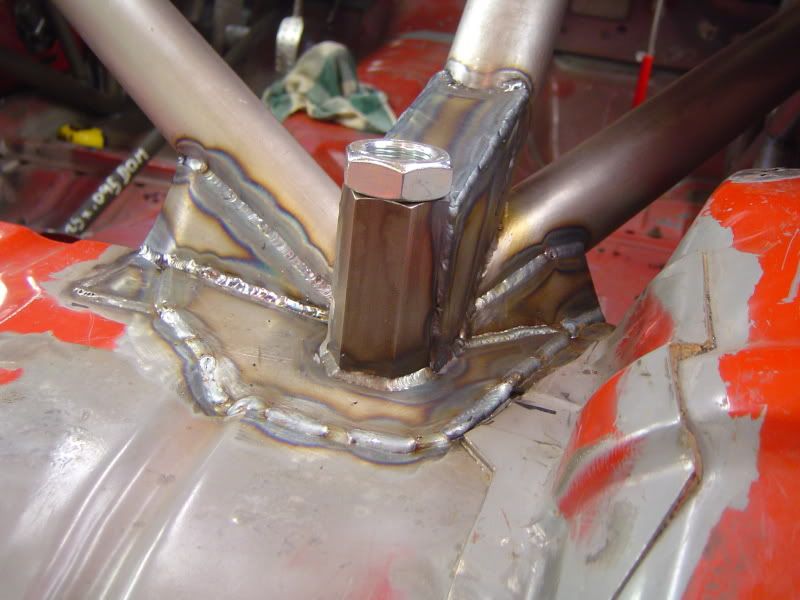
2 pics above: the rear mounts for the cage are finished, and the cage is officially done! Integrated in the mounts is a 1"-14 coupling nut which will a jack bolt will be threaded into. Below that will be the spring seat and spring. I'll be able to adjust ride height and corner weight the car from up top, then lock it down with the jam nuts.
Last edited by StanIROCZ; 03-05-2010 at 11:30 PM.
What's still needed before I give the car to Keith:
lexan headlight covers - drilling holes in facia, brackets, and fitting etc
seat belt anchors
steering column mount
rear view mirror mounts
brake lines
wiring - basic layout to make sure I have holes in the right spots etc
new door pins on pass side
hood fitment and pins
order hood
lexan hatch fitment + flange
tow hooks
pull engine
fill holes in firewall
Wiper bucket cover?
Last edited by StanIROCZ; 03-05-2010 at 10:57 PM.
There are currently 1 users browsing this thread. (0 members and 1 guests)
 Posting Permissions

 Reply With Quote

Bookmarks